Tongue-and-groove pliers will not stay clamped when you let go because they are not self-locking pliers. Their adjustable joint sets the jaw opening so you can grip different sizes of pipe, fittings, and fasteners. Your hand supplies the clamping force. Release the handles, and the jaws open enough for the tool to fall away when bumped.
That behavior is normal, not usually a defect. If you need a tool to remain attached without holding the handles, use locking pliers with an adjustable screw and locking linkage, or use a wrench designed for the fitting. Do not leave tongue-and-groove pliers hanging from a pipe or rely on them to hold a load.
What the Groove Joint Actually Does
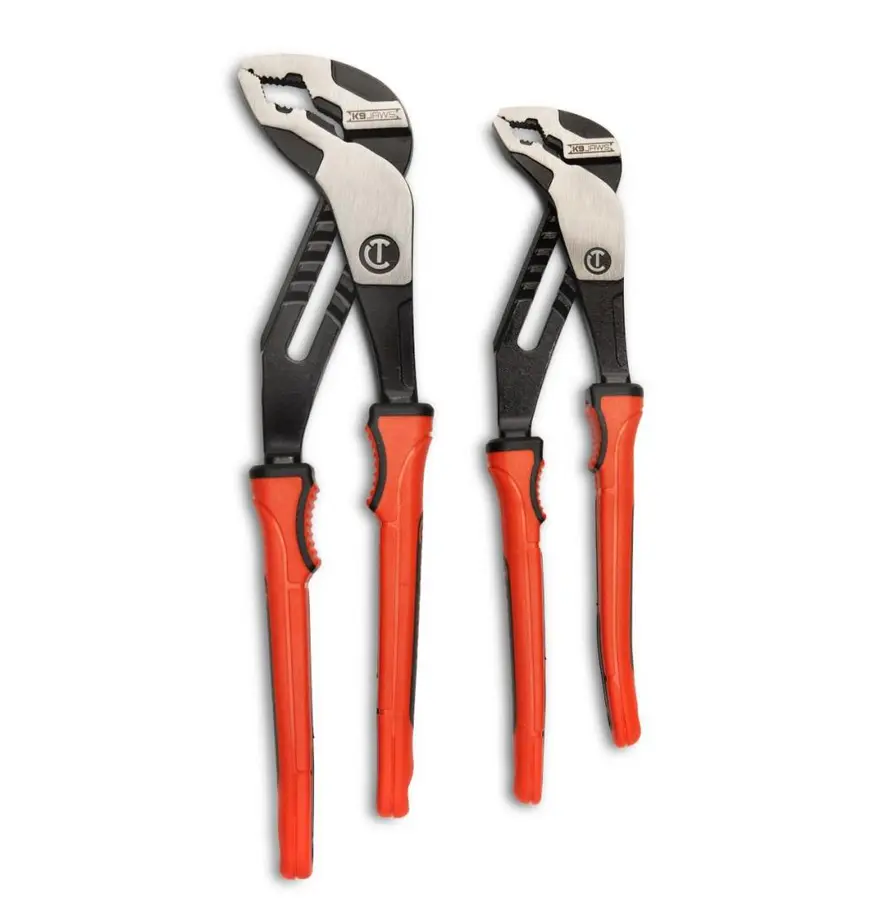
Tongue-and-groove pliers have an adjustable pivot. One handle has a tongue or sliding section, and the other has several matching grooves. Moving the tongue to another groove changes the distance between the jaws.
The adjustment gives the tool a wide capacity range. It does not create a latch, cam lock, or over-center mechanism that holds pressure after you release the handles.
A useful way to separate the two functions is:
- Groove adjustment: sets the starting jaw opening.
- Hand pressure: creates the grip while you squeeze.
- Locking mechanism: keeps clamping force applied after you release the handles.
Tongue-and-groove pliers have the first two functions. Locking pliers are designed to provide all three.
Tongue-and-Groove Pliers vs. Locking Pliers
Tongue-and-groove pliers are adjustable gripping tools. Their long handles and angled, serrated jaws make them useful for temporarily turning or holding pipes, round stock, irregular objects, and some large fittings. You keep the grip by maintaining pressure on the handles.
Locking pliers use a different arrangement. A screw generally sets an approximate jaw opening, then the handles close through a locking linkage. Once adjusted and locked, they can stay attached until their release lever is operated.
That does not mean locking pliers are automatically the best choice for every pipe or fitting. Their jaws can damage soft metal, plated parts, painted surfaces, plastic, and finished hardware. A correctly sized wrench, strap wrench, or other fitting-specific tool may be the better option where surface damage matters.
Why Adjustable Pliers May Slip Even While You Are Holding Them
A pair that falls off after you release it is behaving normally. A pair that slips while you are squeezing it may be incorrectly adjusted, poorly positioned, worn, or simply the wrong tool for the work.
The Jaw Opening Is Set Too Wide
Set the joint so the jaws close around the work without the handles being spread uncomfortably far apart or nearly touching before the jaws grip. If the setting is too loose, the jaws can contact only an edge or corner and cam outward as you apply turning force.
Move the joint one position tighter or looser as needed, then close the jaws on the work before applying force. The best setting depends on the object size and the particular plier design.
The Jaws Are Gripping Corners Instead of Flats
On a hex nut or fitting, place the jaws on broad flat surfaces whenever possible. Gripping the corners concentrates force and makes it easier for the tool to slide or round the part.
On round pipe, seat the curved or serrated jaw area evenly around the pipe. Avoid using only the jaw tips if more of the jaw can contact the work. More stable contact generally gives you better control.
The Turning Direction Works Against the Teeth
Serrated jaws are meant to bite as force is applied in one direction. Reposition the pliers if the tool tends to walk or slide off as you pull. The goal is to have the jaw teeth resist the direction of rotation rather than be pushed out of contact.
If you must reverse direction, reposition the pliers instead of trying to twist your wrist or force the tool from an awkward angle.
The Jaws or Pivot Are Worn
Worn teeth may look polished, flattened, or uneven. A loose pivot can allow the jaws to spread sideways under load. Either condition reduces grip and control.
Do not compensate for visibly worn or damaged pliers by using excessive force. Replace or retire a tool that cannot maintain stable jaw contact for the task.
The Surface Is Too Smooth or Too Delicate
Serrated jaws need something they can bite into. Smooth chrome, polished metal, plastic, and coated surfaces can slip, and aggressive gripping can leave permanent marks.
For exposed plumbing trim, finished fixtures, and delicate fittings, choose a tool intended to protect the surface. If using any tool near a finished part, first confirm the correct method in the fixture or fitting manufacturer’s current instructions.
How to Use Groove-Joint Pliers Correctly
Use tongue-and-groove pliers as a hand-held turning or holding tool, not as a clamp left unattended.
1. Choose a Stable Jaw Setting
Open the handles and move the tongue into a groove that gives a close starting fit around the work. Close the jaws by hand to check that they contact the object squarely.
The exact adjustment varies by plier design. Verify that the tongue is fully seated in its selected groove before applying force.
2. Position the Jaws Fully
Place the jaws as deeply and evenly on the work as the shape allows. On hex fittings, use the flats. On round material, use the jaw profile intended to cradle the round surface.
Keep fingers clear of the moving joint and jaw area as you adjust and squeeze the tool.
3. Squeeze and Turn With Control
Maintain firm hand pressure while turning. Pull smoothly rather than jerking the tool. If the pliers begin to shift, stop, reset their position, and reassess the jaw setting instead of continuing to force the turn.
Do not add handle extensions or otherwise modify the pliers to gain leverage unless the current manufacturer documentation specifically permits it. Extra leverage can damage the tool, the fitting, or the surrounding work.
4. Release the Tool When Finished
When you relax your grip, expect the pliers to release. Set them down rather than leaving them balanced on a pipe, fitting, or elevated surface.
When a Different Tool Is Better
Tongue-and-groove pliers are versatile, but versatility is not the same as precision. Select another tool when the job calls for a more controlled grip or less surface damage.
Use Locking Pliers When You Need Temporary Hands-Free Holding
Locking pliers are appropriate when the work genuinely requires a tool to remain clamped after you release it. Adjust them carefully: excessive locking force can deform thin material or mar surfaces.
Do not treat a locked pair of pliers as a secure support, lifting point, or substitute for a proper clamp. Check the locking plier manufacturer’s current instructions for intended use, adjustment, inspection, and safety limits.
Use the Correct Wrench for Nuts and Fittings
For a hex nut or bolt, a correctly sized wrench or socket usually provides better contact with less risk of rounding the corners. For plumbing connections, the fitting design may call for a particular wrench or holding method.
Many plumbing connections also require holding one component while turning another. Before applying force, verify the fitting manufacturer’s instructions so you do not twist a connected pipe, valve body, or fragile fixture.
Use a Surface-Protecting Tool for Finished Parts
A strap wrench or another non-marring tool may be more suitable for polished, painted, plated, or plastic components. Do not assume a rag under serrated jaws will prevent damage or make an unsuitable tool safe for a delicate fitting.
Common Mistakes to Avoid
- Expecting the groove joint to lock the handles closed.
- Choosing a jaw setting that is too loose and gripping only edges or corners.
- Turning a hex fitting with the jaws perched on its points.
- Pulling from an awkward angle that lets the tool cam off the work.
- Using serrated jaws on visible finished surfaces without considering damage.
- Trying to make up for worn teeth or a loose pivot with more force.
- Using pliers in place of the wrench or fitting-specific tool called for by the manufacturer.
- Leaving non-locking pliers attached to a pipe or fitting and expecting them to stay there.
The Bottom Line
Tongue-and-groove pliers do not stay clamped because their grooves adjust jaw size rather than lock the jaws shut. They hold only while you maintain pressure on the handles.
Set the jaws close to the work, place them squarely on stable surfaces, and keep hold of the handles while turning. If you need hands-free clamping, use locking pliers or a proper clamp. If you need to turn a finished, delicate, or precisely sized fitting, use the wrench or specialty tool specified for that work and verify the current manufacturer guidance before proceeding.
References
- Tongue-and-Groove Pliers: How They Work & Examples | FIRGELLI. (n.d.). https://www.firgelliauto.com/blogs/mechanisms/tongue-and-groove-pliers
- Tongue-and-groove pliers - Wikipedia. (n.d.). https://en.wikipedia.org/wiki/Tongue-and-groove_pliers
- How To Use Tongue And Groove Pliers (Channel Locks). (n.d.). https://www.youtube.com/watch?v=u7brtGJk_uo
- Tongue and groove slip joint pliers with unknown factory attachments. (n.d.). https://www.facebook.com/groups/dullmensclub/posts/2027658247890706
- Tongue and Groove Joint Pliers | Chinese Manufacturer. (n.d.). https://plierpincer.com/pliers/tongue-and-groove-joint-pliers
- Hand and Power Tools. (n.d.). https://www.osha.gov/sites/default/files/publications/OSHA3080.pdf
- Should I “upgrade” my tongue & groove pliers? - The Garage Journal. (n.d.). https://www.garagejournal.com/forum/threads/should-i-upgrade-my-tongue-groove-pliers.423860
- Types of pliers, lugs, rigging tools, hoses, and carts explained. (n.d.). https://www.facebook.com/TvRepairBD/posts/worked-for-13stypes-of-pliers1-linemans-pliersdesigned-for-gripping-twisting-ben/1483714883778983
- Locking pliers vs tongue and groove | BobIsTheOilGuy. (n.d.). https://bobistheoilguy.com/forums/threads/locking-pliers-vs-tongue-and-groove.410292
- Choosing and Using the Right Plier for the Job. (n.d.). https://www.grainger.com/know-how/equipment/kh-types-pliers-guide
 Pliers Wrench vs. Tongue-and-Groove Pliers: Which Jobs Each Handles Best
 How to Sharpen a Wood Chisel: Flatten, Hone, and Test the Edge
 How to Measure and Mark Long Boards When Working Alone