A masonry drill bit that suddenly drills slowly is usually no longer cutting efficiently. In hard concrete or granite-like stone, the common causes are a worn or overheated carbide tip, dust packed in the hole, the drill being in the wrong mode, or a bit and tool combination that is not suited to the material.
Stop forcing the drill. More pressure on a hot, slow bit usually creates more friction and heat, while doing little to restore progress. Let the bit cool, inspect the carbide tip, clear the hole, confirm the tool setting in the current manufacturer manual, and try again with controlled pressure. If the bit remains slow after those checks, replace it or reconsider the drilling method for the material.
Start With the Material and the Hole
A bit that works well in ordinary concrete, brick, or mortar can slow dramatically when it reaches unusually hard aggregate, dense stone, or a hard inclusion within the wall or slab. This does not always mean the drill has failed.
Granite and other natural stones are a useful example. They can be much denser and more abrasive than the material around them. A conventional carbide masonry bit may make limited progress, especially if the hole is deep or the bit has already drilled several anchor holes. Some stone surfaces also require a different drilling approach or a purpose-made bit to avoid poor progress or surface damage.
Before changing settings or applying more force, identify the material as accurately as possible. If it is structural concrete, unknown stone, tile over masonry, or a finished surface where cracking matters, verify the drilling method with the material, anchor, and tool manufacturers’ current instructions.
Inspect the Carbide Tip Before Drilling Again
A carbide masonry bit cuts by concentrating impact and abrasion at its carbide insert. When that insert loses its edge geometry, the bit begins rubbing and grinding rather than breaking material into dust.
Signs the Bit Is Worn Out
Replace the bit if the carbide tip is visibly:
- Rounded or polished smooth at the cutting edges
- Chipped, fractured, or uneven
- Cracked
- Loose or separating from the steel body
- Worn back enough that the steel body may be contacting the hole
A worn bit can feel deceptively normal in the drill. The motor may still run at speed, but the hole advances very slowly and the bit becomes hot. If a hole that once took seconds now takes much longer in comparable material, treat that loss of speed as a practical wear signal.
Do not try to compensate for a damaged carbide insert by leaning harder on the drill. A damaged bit can overheat further, drill an inaccurate hole, and put unnecessary load on the drill and chuck.
Check the Drill Mode and Bit System
A common cause of sudden slow drilling is a drill that has been switched to rotation-only mode. In ordinary concrete and masonry, a compatible hammer-drill or rotary-hammer mode is generally what allows a carbide bit to fracture material rather than merely rub against it.
Confirm all of the following in the current tool manual:
- The drill is set to the intended operating mode.
- The bit shank type is approved for that drill or chuck.
- The bit diameter is within the tool’s stated capability.
- The selected mode is appropriate for the material and finish condition.
Do not assume hammer action is correct for every hard surface. Some natural stone, tile, and brittle finished materials may require a different bit or drilling method. Verify the material-specific recommendation before using impact action.
Clear Dust From the Hole
A bit often slows down as a hole gets deeper because dust has nowhere to go. Packed debris fills the flutes, reduces contact with fresh material, and turns drilling into friction.
Periodically withdraw the bit enough to clear accumulated dust rather than holding it at the bottom of the hole continuously. Then remove loose debris from the hole using a method appropriate for the job and dust-control plan.
Hole cleaning matters for two reasons. It helps the bit keep cutting, and it can be important for anchor installation. Follow the anchor manufacturer’s current instructions for required hole diameter, depth, and cleaning procedure; a hole that looks complete may not be suitable for the specified anchor if debris remains inside.
Reduce Heat Instead of Pushing Through It
Heat is a warning that the bit is rubbing, the hole is packed, the tool setup is wrong, or the material is beyond what the bit is handling well. A discolored bit body or a very hot tip should prompt a pause and inspection.
Use steady, controlled feed pressure rather than maximum body weight. The bit needs enough pressure to engage the surface, but excessive pressure can reduce effective hammer action on some tools and increase friction. Let the tool and bit do the work at the rate the material allows.
If the bit becomes hot or drilling slows sharply, stop and allow it to cool before continuing. Do not apply water or another coolant to a tool, bit, or work area unless the drill, bit, electrical setup, and material instructions specifically permit that method. Water use around powered tools and masonry dust requires job-specific precautions.
Consider Whether the Bit Is Too Small or Too Light-Duty for the Job
Not all carbide masonry bits are intended for the same duty. A small, general-purpose bit that performs adequately for a few shallow holes in block may wear quickly in dense concrete or hard stone. Repeated holes, deep holes, and larger diameters increase the demand on the cutting tip and dust-removal flutes.
If the same job repeatedly ruins or slows a basic masonry bit, use a bit system and drilling method rated by its manufacturer for the material and hole size. For very hard stone, a diamond drilling accessory or another specialized method may be more appropriate than continuing with a standard carbide masonry bit. Confirm compatibility with the drill and the intended material before changing accessories.
Rule Out an Obstruction
A sudden change at one specific depth can mean the bit has reached something different from the surrounding material. It may be hard aggregate, reinforcing steel, embedded hardware, a void, or another concealed condition.
Do not keep forcing the bit if progress stops abruptly or the drill behaves unusually. In walls, floors, and slabs, concealed utilities and structural reinforcement may be present. Use the applicable plans, detection methods, and site procedures before deciding how to proceed. Do not drill through suspected reinforcement, electrical components, plumbing, or other embedded services without authorization and an appropriate method.
A Quick Diagnostic Sequence
When a masonry bit is suddenly slow, work through this order:
- Stop drilling before the bit overheats further.
- Let the bit cool and inspect the carbide insert for rounding, chips, cracks, or looseness.
- Clear dust from the flutes and hole.
- Confirm the drill mode, bit shank, and bit diameter in the current manufacturer documentation.
- Resume with steady pressure rather than forcing the tool.
- Stop again if the slowdown begins at one exact depth; investigate for a change in material or an obstruction.
- Replace the bit if the carbide is worn or damaged, or if a sound bit remains ineffective in the material.
When to Stop Rather Than Force the Drill
Stop the job and reassess if the carbide insert is damaged, the bit is overheating repeatedly, the drill cannot maintain normal operation, or the hole has stopped advancing at a consistent depth. Continuing can damage the bit, enlarge or distort the hole, and create a poor anchor installation.
Masonry drilling also produces dust that may require specific controls. Review the current tool manual, bit instructions, anchor instructions, and applicable workplace or local authority guidance before drilling, especially indoors, overhead, in occupied spaces, or in concrete where silica-containing dust may be generated.
The practical fix is often simple: replace a worn carbide bit, restore the correct drill mode, and keep the hole clear. But when the material is unusually hard—as with dense granite or hard aggregate—the right answer may be to stop using a general-purpose masonry bit and switch to a method designed for that surface.
References
- What Hammer Drill Bit Should You Use for Concrete and Masonry? - Champion Chisel Works. (n.d.). https://championchisel.com/blog/what-hammer-drill-bit-should-you-use-for-concrete-and-masonry-226654
- How To Drill Through Granite And Natural Stone: Bits, Water, And Technique. (n.d.). https://drillbitsworld.com/how-to-drill-through-granite
- How To Extend the Life of Masonry Drill Bits. (n.d.). https://www.drillbitwarehouse.com/how-to-extend-the-life-of-masonry-drill-bits
- Drill Bit Failure Analysis: Why Your Bits Snapped or Burned. (n.d.). https://www.zhonghuantools.com/en/resources/drill-bit-failure-analysis
- Masonry bits dulling after 3-4 holes. (n.d.). https://diy.stackexchange.com/questions/183113/masonry-bits-dulling-after-3-4-holes
- Masonry Drill Tips: Fix Slow Drilling in Brick - Expert Q&A. (n.d.). https://www.justanswer.com/home-improvement/lemxy-masonry-drill-question-installing-light-fixtures.html
- Guide to Essential Masonry Drill Bits. (n.d.). https://beavertools.com/blogs/blog/selecting-the-right-masonry-drill-bit
- Drill Bits Buying Guide – Harbor Freight. (n.d.). https://www.harborfreight.com/guides-news/buying-guides/drill-bit-buying-guide
- Failure Troubleshooting Guide-EN. (n.d.). https://www.rockmore-intl.com/download/66/integral-rod-product-information/2736/failure-troubleshooting-guide-en-6.pdf
- How Do You Know When a Drill Bit Is Too Dull to Keep Using?. (n.d.). https://bestwin-tools.com/how-know-drill-bit-dull-replace
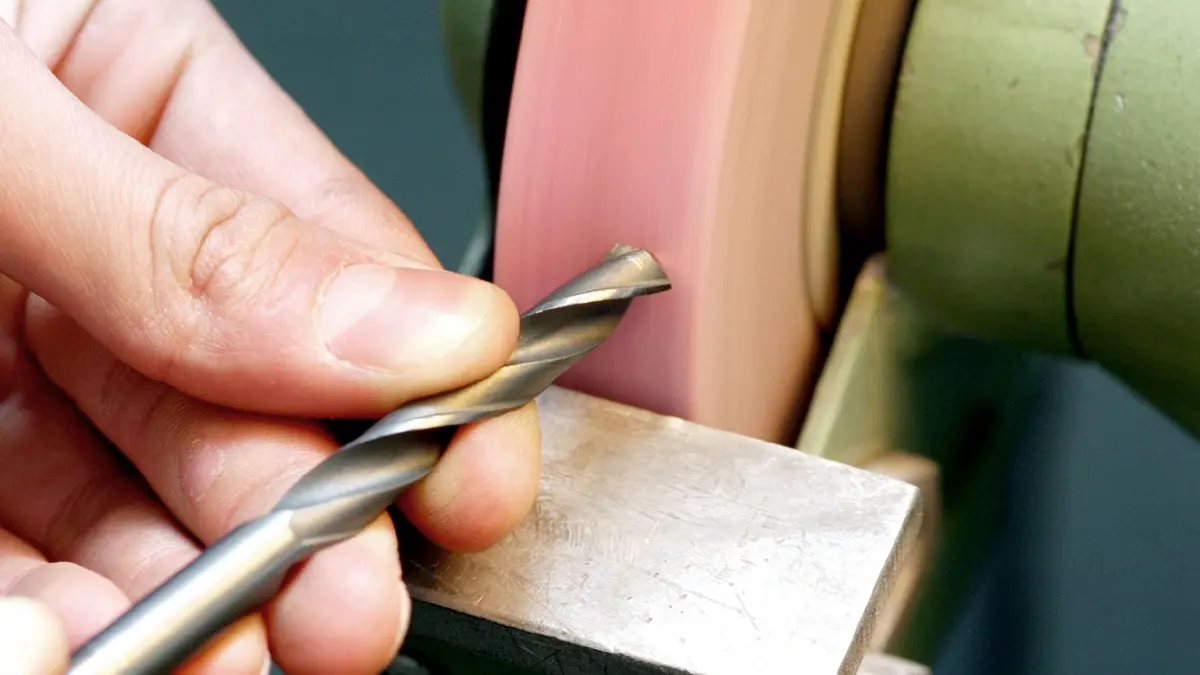 How to Sharpen Twist Drill Bits: When to Resharpen, Replace, or Recycle
 How to Drill Thin Sheet Metal Without the Bit Grabbing or Tearing the Hole
 Why Small Drill Bits Break or Dull Quickly When Drilling Circuit Boards