A circular saw can make a straight long plywood cut without a track saw: clamp a known-straight board or metal straightedge to the sheet and keep the saw’s base pressed against it. The key is placing that guide beside—not on—the layout line by the exact distance from your blade to the guide-side edge of the saw base.
That distance is the base-plate offset. It is not the blade kerf. Measure it on your own saw, make a test cut, and use it every time you set up a basic straightedge guide. For repeat cuts, a shop-made zero-clearance guide removes the offset calculation altogether.
What you need
- Circular saw with a sharp blade appropriate for plywood
- A straight, stiff guide longer than the cut: a factory-straight plywood edge, straight board, or metal straightedge
- Two clamps that will not interfere with the saw or its motor housing
- Tape measure, pencil, and square or long ruler
- Stable sheet support, such as a cutting table, sacrificial panels, or rigid foam beneath the plywood
Before using the saw, review its current manufacturer manual for blade selection, setup, guard operation, required protective equipment, and operating instructions. Also follow applicable local safety guidance.
Understand the two measurements that matter
Blade-to-base offset
The offset is the distance from the blade’s cutting path to the outside edge of the saw base that will touch the straightedge.
For example, if the guide will be on the left side of the saw, measure from the blade to the left edge of the base. Do not assume the two sides of the base have the same offset. Many saws have a different distance on each side.
Kerf
The kerf is the width of material removed by the blade. It matters when final part size is critical, especially if you are cutting on one side of a marked line. It does not tell you where to clamp a conventional straightedge.
A useful rule:
- Use the base-plate offset to locate the guide.
- Use the kerf to decide which side of the pencil line becomes waste.
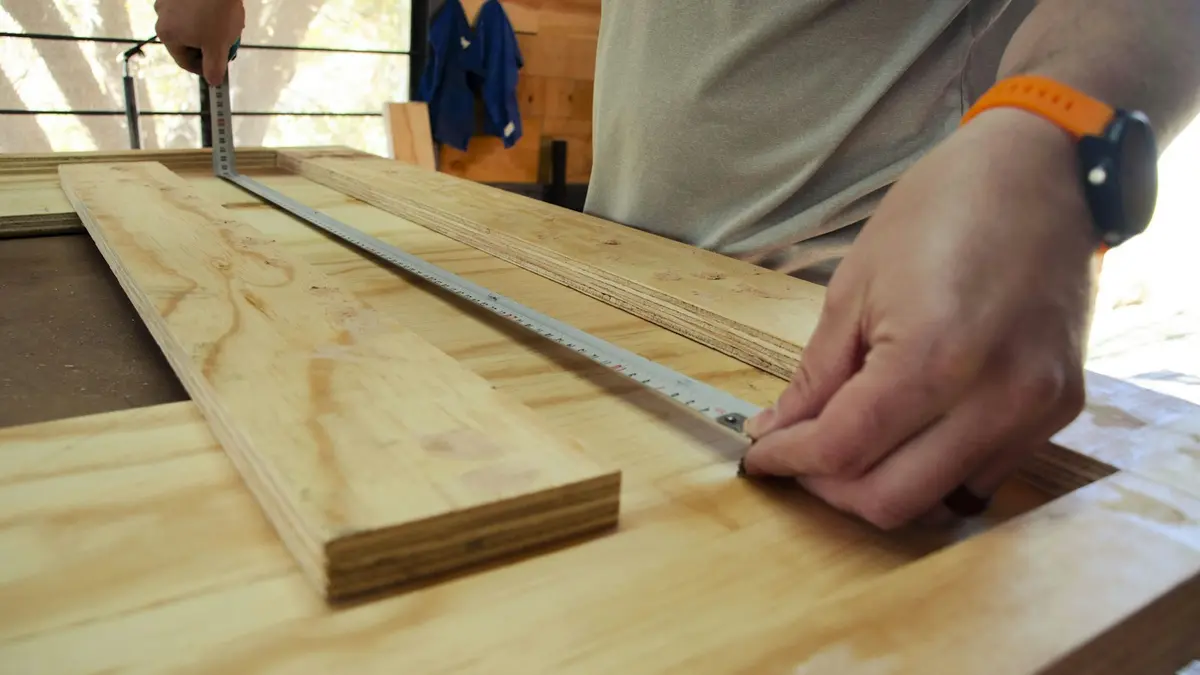
Measure your circular saw’s offset
Do this once for each base edge you may use against a guide, then label the measurements on the saw or keep them in your shop notes.
- Unplug a corded saw or remove its battery before measuring or adjusting it.
- Place the saw on a flat surface with the blade fully stopped.
- Identify the base edge that will ride against the straightedge.
- Measure from the blade’s cutting path to that base edge. Measure to the side of the blade that corresponds with the intended cut path, not to a blade tooth that projects outward.
- Write down the result.
- Make a test cut on scrap using a clamped guide. Measure the result and revise your recorded offset if necessary.
A test cut is worth the few minutes it takes. It confirms your measurement, shows which side of a layout line your blade removes, and reveals whether your straightedge is actually straight.
Source: Unsplash
Set up the plywood so the cut stays open
A straight guide cannot compensate for an unstable sheet. Support the plywood across its area while leaving clearance below the cut line for the blade.
Rigid foam insulation or sacrificial support panels under the full sheet can work well because they support both the keeper piece and the offcut. A pair of sawhorses can also work if the sheet is supported so neither piece can sag, shift, or close on the blade path.
Plan where the offcut will go before starting. Do not hold up a large offcut by hand while operating the saw, and do not arrange support so the kerf closes as the cut progresses. If the sheet is awkward to manage alone, get help positioning it before the cut rather than trying to control the panel during the cut.
Clamp a straightedge for a long plywood cut
1. Mark the finished cut line
Measure from a factory edge when possible. Mark the desired finished edge at both ends of the cut, then connect the marks with a long ruler or straightedge.
If the line represents the finished part, mark the waste side clearly. This reduces the chance of cutting the wrong side of the line when the guide covers part of your layout.
2. Choose the guide side
Put the straightedge on the side of the saw base that is comfortable to keep against the guide for the entire cut. The guide should be on the waste side when practical, but the important point is that the blade reaches the correct cut line and the saw can travel without obstruction.
Check that clamps, the guide, and the saw’s motor housing have adequate clearance throughout the cut. A clamp that looks clear at the start may be in the saw’s path near the end.
3. Transfer the offset at both ends
From each end of the cut line, measure outward toward the guide location by your saw’s base-plate offset. Mark those two offset points.
Align the straightedge with both offset marks—not with the original cut line. Clamp the guide securely near each end, then recheck its position after clamping. Clamps can pull a light guide slightly out of alignment.
4. Verify before cutting
Set the saw on the plywood with its base against the guide, without starting the tool. Look through the saw’s sight notch only as a rough check; the blade path and your test cut are more reliable.
Confirm all of the following:
- The blade will cut on the intended side of the layout line.
- The saw base stays fully supported on the plywood at the beginning and end of the cut.
- The guide remains clear of the blade.
- The saw can pass both clamps without contact.
- The plywood and both resulting pieces are supported.
Make the cut
Set the saw according to its manufacturer’s instructions. In general, avoid setting more blade exposure below the sheet than the manual calls for or than is necessary for the supported cutting setup.
Stand where you can move with the saw without reaching across the blade path or overbalancing. Start with the saw positioned correctly and the blade clear of the workpiece. Once the saw is running as directed by its manual, begin the cut and keep the base pressed flat to the plywood and sideways against the guide.
Use a steady forward feed. Do not try to steer the saw away from the guide, and do not force it if cutting becomes difficult. Stop and investigate if the saw seems to bind, the sheet moves, the cut closes, or the guide shifts. Wait for the blade to stop fully before moving material or changing the setup.
At the end of a long cut, keep the saw base supported until the blade has cleared the sheet. Let the offcut settle onto its support rather than catching it.
Make a zero-clearance DIY circular saw track guide
A zero-clearance guide is faster and less error-prone than measuring the offset every time. Its trimmed edge marks the exact blade path for the saw used to make it.
To build one, use a wide, flat base made from plywood or hardboard and fasten a straight fence along it. The fence needs enough width for the saw base to ride against it, plus room to clamp the guide without placing clamps in the saw’s travel path.
- Start with a straight fence edge. A factory edge is often useful if it is undamaged and truly straight.
- Attach the fence to the base so it runs straight along the full length.
- Clamp the assembly to sacrificial support.
- Run your circular saw along the fence and trim the excess base material.
- Label which side and which saw the guide was made for.
After trimming, the base edge is the blade path. To use the guide, align that trimmed edge directly with the cut line, clamp it, and run the same saw along the fence. This style of straightedge guide is especially useful for repeated long plywood cuts because there is no separate offset measurement during setup.
A guide is only accurate while its fence, base, and trimmed edge remain undamaged. Store it flat so it does not bow, and replace it if the edge becomes chipped or no longer tracks accurately.
Common guide-placement mistakes
Clamping the guide directly on the cut line
With a plain board used as a guide, the saw blade is offset from the board by the width of the saw base. If you clamp the board on the cut line, the cut will miss the line by that offset.
Fix: Move the guide by the measured blade-to-base offset, or use a zero-clearance guide whose trimmed edge is the cut line.
Measuring from the wrong base edge
An offset measured to the right edge of the base will not work if the left edge runs against the straightedge.
Fix: Measure and label both sides separately if you use both sides.
Using a bowed or questionable straightedge
A guide only reproduces its own shape. A bowed board produces a bowed cut.
Fix: Check the guide against a known straight edge or stretch a line along it to look for gaps before trusting it on a final panel.
Letting clamps block the saw
A clamp can stop the saw abruptly or force you to pull away from the guide.
Fix: Dry-run the entire saw path with the tool off and reposition clamps before cutting.
Supporting only the ends of the sheet
A large plywood panel can sag in the middle, shift, or pinch the kerf when poorly supported.
Fix: Use broad, stable support under the sheet while maintaining clearance under the cut line.
Cutting on the wrong side of the line
Even a perfectly straight cut can make an undersized part if the blade removes material from the finished side.
Fix: Mark the waste side and make a test cut whenever final dimensions matter.
Getting a cleaner plywood edge
A straight guide improves accuracy, but cut quality also depends on blade condition, plywood veneer, feed rate, and support. Use a sharp blade suited to plywood, support the sheet to reduce vibration, and avoid rushing the cut.
For a visible finished edge, make a short test cut in an offcut from the same plywood. If the face veneer chips, consider placing the better face according to the saw manufacturer’s guidance and the direction of cut for your saw. You can also review our guide to preventing circular saw tear-out for additional setup and finishing options.
Quick setup checklist
Before every long plywood cut, confirm:
- The cut line and waste side are marked.
- The guide is straight and long enough.
- The correct base-plate offset was used, or a zero-clearance guide is aligned to the line.
- The guide is clamped securely and the clamps are out of the saw’s path.
- The entire sheet, keeper piece, and offcut are supported.
- The saw’s settings, blade, guard operation, and protective equipment have been checked against the current manufacturer manual.
- You have made a dry run with the saw off.
With that setup, the circular saw does not need to be guided freehand. The straightedge controls the path, while careful offset measurement puts that path exactly where the finished plywood cut needs to be.
References
- Circular Saw Guide: 3 Easy Methods for Straight Cuts - This Old House. (n.d.). https://www.thisoldhouse.com/house-one/diy-circular-saw-guide
- How to Cut Plywood With Circular Saw: Expert Tips and Tricks. (n.d.). https://woodworkingadvisor.com/how-to-cut-plywood-with-circular-saw
- How To Cut Plywood Straight With A Circular Saw? - Get Perfect Cuts. (n.d.). https://toolsadvisers.com/how-to-cut-plywood-straight-with-a-circular-saw
- How To Cut Plywood Circular Saw? Expert Tips & Tricks. (n.d.). https://toolsadvisers.com/how-to-cut-plywood-circular-saw
- How to Make Straight Cuts with a Circular Saw [5 ways]-Step-by-Step. (n.d.). https://www.youtube.com/watch?v=q_7MZvxSzKk
- Don’t freehand cut with a circular saw. A straight cut helps …. (n.d.). https://www.facebook.com/anikasdiylife/videos/how-to-cut-plywood-with-circular-saw/710740725460290
- Easy DIY Circular Saw Straight Edge Guide | Heartwood Art. (n.d.). https://heartwoodart.com/easy-diy-circular-saw-straight-edge-guide
- Circular Saw Jig: Achieve Precise Cuts Every Time - Rockler. (n.d.). https://www.rockler.com/learn/circular-saw-cutting-jigs
- How To Make A Straight Cut With Circular Saw? - Easy Guide For You. (n.d.). https://toolsadvisers.com/how-to-make-a-straight-cut-with-circular-saw
- How to Cut Plywood with Circular Saw | 10 Easy Methods (2026). (n.d.). https://woodfixes.com/how-to-cut-plywood-with-circular-saw
 How to Reduce Tear-Out With a Circular Saw
 Why a Circular Saw Blade Deflects During a Cut and How to Troubleshoot It
 Circular Saw vs. Miter Saw vs. Router: Which Tool Fits the Cut You Need?