A stored gas mower needs more than fresh fuel before its first cut. Start with the owner’s manual, then inspect the mower’s safety controls, fuel system, oil, air filter, spark plug, deck, and blade in that order. Do not start a mower with a fuel leak, damaged blade, loose hardware, missing shield, or control that does not stop the engine or blade as intended.
Most walk-behind mower owners can handle routine cleaning and inspection. Oil changes, air-filter service, and spark-plug replacement are often owner tasks when the manual provides the procedure. Carburetor disassembly, fuel-line replacement, blade straightening, engine repairs, and any repair involving uncertain safety-control operation are better left to a small-engine technician.
Start with the owner’s manual
Use the manual for your exact mower model as the service authority. It identifies the correct engine-oil type and capacity, spark plug specification, service intervals, blade orientation, replacement parts, and required fastener torque. Maintenance schedules vary by engine and mower design. For example, Honda walk-behind mower manuals call for inspections of the blade, blade mounting bolts, engine oil, air filter, spark plug, rear shield, and blade-control operation at specified intervals. Honda owner’s manual
If the manual is missing, obtain the current version from the mower or engine manufacturer using the model and serial numbers. Do not guess at oil viscosity, plug type, blade hardware, or blade-bolt torque.
Safety setup before service
Work outside or in a well-ventilated area, on a level surface, with the engine cool. Keep ignition sources away from gasoline and wipe up spills before attempting a start.
Before working near the blade, underneath the deck, or around moving parts:
- Stop the engine and wait for all moving parts to stop.
- Disconnect the spark-plug wire and secure it away from the plug.
- Remove the ignition key, if equipped.
- For electric-start or riding equipment, follow the manual’s battery-disconnection procedure where applicable.
- Wear eye protection and sturdy gloves; use thick leather gloves when handling a blade.
Do not rely on the blade-control handle alone while servicing. A manufacturer manual specifically warns that improperly torqued blade bolts can allow a blade to loosen and be thrown from the mower. Honda owner’s manual
Lawn mower preseason checklist
1. Inspect the exterior and safety equipment
Walk around the mower before adding fuel or starting it. Look for cracked plastic, loose fasteners, damaged wheels, worn handles, and signs of rodent nesting around the engine or cooling area.
Check that the following are present, secure, and undamaged:
- Rear discharge shield or flap
- Grass bag and bag frame, if used
- Mulching plug or discharge chute, if applicable
- Blade-control bail and cable
- Throttle, choke, primer, fuel shutoff, and drive controls, where fitted
- Recoil starter rope and handle
Test control operation only as the manual directs. The blade-control system is a safety device, not a component to bypass, tie back, or modify. If a cable binds, the control does not return freely, or the mower fails to stop as intended during a later test run, stop using it and arrange service.
2. Check old fuel before trying to start
Fuel left through storage can cause hard starting and poor running. Look for stale-fuel odor, discoloration, debris, water contamination, or varnish-like residue in the tank. Also inspect the fuel cap, fuel line, fuel filter if equipped, and connections for wetness, cracks, brittleness, or leaks.
If fuel appears questionable, do not dilute it with fresh gasoline and hope for the best. Follow the mower manual and local disposal guidance for removing old fuel. Refill only with the fuel specified by the manufacturer.
A mower that has fresh, correct fuel but still will not start, surges, dies under load, or leaks fuel may need fuel-system service. Cleaning a lawn mower carburetor is not automatically a first-step spring task. External cleaning and inspection are reasonable for many owners, but internal carburetor cleaning can require disassembly, replacement gaskets, and correct adjustment procedures. Have a technician handle it if the manual does not clearly support the work or if fuel is leaking.
3. Check the oil level and change oil when due
Check the engine oil before starting. Place the mower on level ground and use the dipstick or oil-fill procedure in the manual. Oil below the safe range, excessively dirty oil, or oil with an abnormal milky appearance deserves attention before the mower is run.
A lawn mower oil change is generally due according to the manufacturer’s calendar or operating-hour schedule. Some engines also require an initial oil change after an early break-in period. Drain and refill only with the oil type, amount, and method specified for your engine; the correct choice can depend on expected outdoor temperature. Honda owner’s manual
Collect used oil in a suitable drain pan and take it to an approved recycling location. Never pour it onto the ground, into a drain, or into household trash.
4. Service the air filter
Remove the air-filter cover and inspect the filter and housing. A foam filter may be cleanable if the manual permits it. A paper filter is often replaced when dirty or damaged rather than washed. Install the filter and cover correctly before running the engine.
Replace a filter that is torn, oil-soaked, heavily clogged, or deteriorated. Do not operate the mower without its air filter or cover. The filter protects the engine from dirt, while the cover helps hold the assembly in its intended position.
5. Inspect the spark plug
Remove the spark plug only after the engine is cool. Check for a damaged insulator, worn electrode, heavy deposits, or signs of oil fouling. Use the exact replacement plug and electrode gap listed in the manual; spark-plug specifications are engine-specific.
Avoid forcing a plug into the cylinder head or overtightening it. Start it by hand to avoid cross-threading, then tighten it according to the manufacturer’s instructions. If the plug is oily or repeatedly fouled, replacement alone may not solve the underlying engine problem.
6. Clean the deck and cooling areas
With the spark-plug wire disconnected, brush or scrape away dry grass and debris from the deck, discharge area, wheels, and exterior of the engine. Clear debris from cooling fins, guards, and air-intake areas without damaging components.
Follow the manual’s instructions before tipping the mower. The direction matters because tipping the wrong way can allow oil or fuel to enter places where it does not belong. If your manual does not give a safe orientation, do not tip the mower until you confirm the procedure with the manufacturer.
7. Perform a mower blade inspection
Inspect the blade for cracks, bends, missing chunks, deep rust, rounded cutting edges, and impact damage. Also inspect the blade adapter, mounting area, and blade mounting bolts. A dull blade can tear grass instead of cutting it cleanly, but a cracked or bent blade is a replacement issue, not a sharpening project.
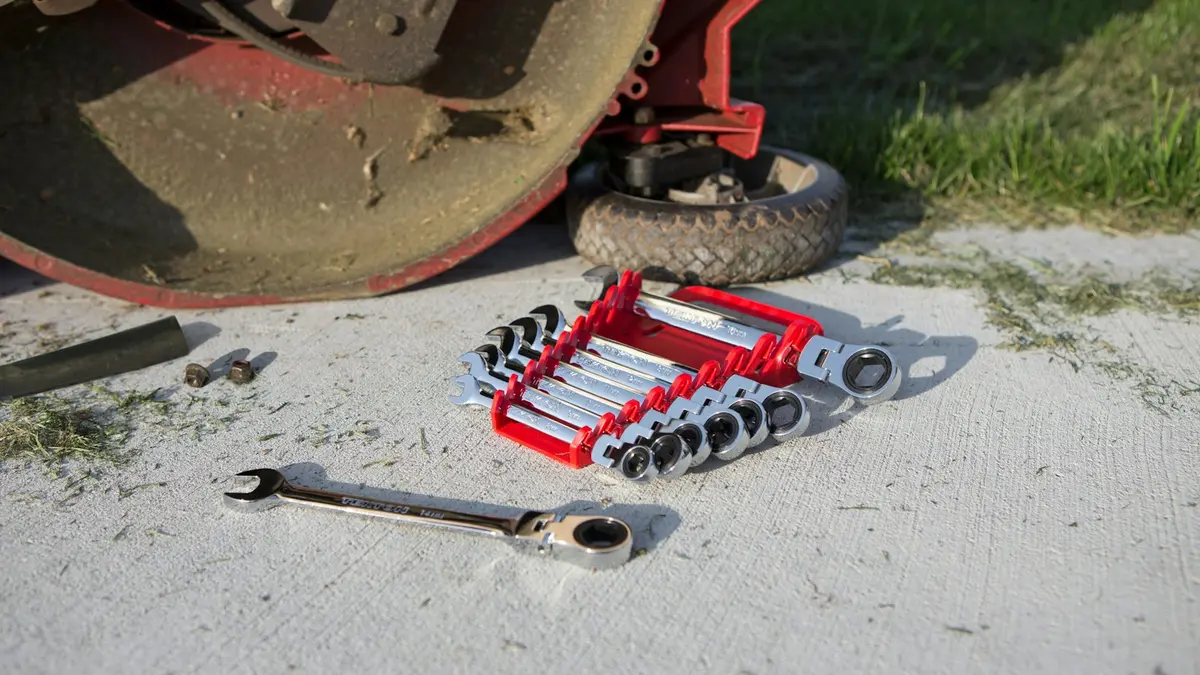
If you remove the blade, photograph or mark its orientation first. Reinstall it exactly as the manual shows and tighten the mounting hardware with a torque wrench to the model-specific specification. Never use a guessed torque value, and never straighten a bent blade.
Source: Unsplash
For more detail on deciding whether a blade can be sharpened or should be replaced, see sharpen or replace lawn mower blades.
8. Check wheels, drive parts, and riding-mower items
For a walk-behind mower, make sure wheels turn freely and height-adjustment levers engage properly. On self-propelled mowers, inspect the drive-control cable and confirm the drive disengages when the control is released.
For riding mowers and zero-turn mowers, the preseason check is broader. In addition to engine service, review tire condition and pressure, belts, battery condition, deck hardware, and steering or drive controls as directed in the machine’s manual. Do not service belts, blades, or drive components with the engine capable of starting.
First-start procedure after service
Move the mower outdoors onto a clear, level area. Keep children, pets, and bystanders away. Reconnect the spark-plug wire only after all service work is complete.
Start the mower according to the manual. Listen for knocking, metal contact, irregular speed, fuel smell, smoke that does not clear promptly, or unusual vibration. Check for leaks while the engine is running from a safe position; do not reach beneath the deck or near moving parts.
After a brief run, verify that the blade-control system and any self-propel control respond correctly. Shut the mower down immediately if it vibrates strongly, throws debris abnormally, leaks fuel or oil, or fails a safety-control check.
When to call a small-engine technician
Schedule professional service instead of continuing to troubleshoot if you find:
- A fuel leak, cracked fuel line, damaged tank, or persistent fuel odor
- A no-start condition after basic manual-approved fuel, air-filter, spark-plug, and oil checks
- Surging, repeated stalling, backfiring, or loss of power that remains after routine service
- A bent crankshaft, severe vibration, blade strike damage, or a blade that will not mount securely
- Damaged wiring, an unreliable electric-start system, or battery problems outside the manual’s owner-service steps
- A safety control, brake, shield, or blade-control mechanism that does not work correctly
Before the first actual mow
Set the cutting height conservatively for the first pass, especially if the lawn is tall after winter. Walk the area first and remove branches, stones, wire, toys, and other debris that could be struck by the blade. Mow only in dry enough conditions for stable footing and clean discharge.
Then keep up with simple in-season care: check oil before use as directed, clean accumulated clippings after mowing, inspect the blade periodically, and address new vibration or poor cutting quality early. Seasonal service works best when paired with the maintenance intervals in your mower’s manual.
References
- Spring Lawn Mower Maintenance Checklist: 10 Steps Before First Mow. (n.d.). https://lawnlove.com/blog/spring-lawn-mower-maintenance
- Lawn Mower Maintenance Schedule: What to Do & When. (n.d.). https://www.powertoolstoday.com/lawn-mower-maintenance-schedule
- Spring Lawn Mower Maintenance Checklist & Routine - Lawn Chick. (n.d.). https://lawnchick.com/spring-lawn-mower-maintenance
- DIY Lawn Mower Maintenance Guide. (n.d.). https://www.lawnstarter.com/blog/lawn-care/lawn-mower-maintenance
- DIY Lawn Mower Maintenance Guide. (n.d.). https://www.lawnstarter.com/blog/lawn-care-equipment/lawn-mower-maintenance
- OWNER’S MANUAL - Honda. (n.d.). https://cdn.powerequipment.honda.com/pe/pdf/manuals/00X31VR8B103.pdf
- Lawn Mower Maintenance Checklist for Longer Life » World Business Outlook. (n.d.). https://worldbusinessoutlook.com/lawn-mower-maintenance-checklist-for-longer-life
- OWNER’S MANUAL - Honda. (n.d.). https://cdn.powerequipment.honda.com/pe/pdf/manuals/00X31VH7A030.pdf
- Spring Startup Checklist: Is Your Lawn Mower Ready for the Season?. (n.d.). https://agnlawn.com/blogs/news/spring-startup-checklist-is-your-lawn-mower-ready-for-the-season
- Zero Turn Lawn Mower Maintenance: Checklist & Service Guide. (n.d.). https://womackfootsteer.com/blog/zero-turn-lawn-mower-maintenance
 Can a Lawn Mower Mulch Leaves and Run Over Small Twigs?