A circular saw blade that starts on the line but pulls to one side once it is fully in the wood is usually deflecting under cutting load, not necessarily proving that the saw is misaligned. The most common causes are a dull or dirty blade, excessive feed pressure, a blade that is too thin or unsuitable for the cut, and wood movement that closes the kerf on the blade.
Start by making one controlled test cut with a known-good blade, properly supported stock, and a straight guide. If the saw still cuts crooked when you are not forcing or twisting it, inspect the blade mounting and then check the saw’s shoe and blade alignment. Stop immediately if the blade binds, the saw stalls, the kerf closes, or the tool tries to climb back toward you. Those are kickback conditions, not accuracy problems to push through.
First, Separate Deflection From Misalignment
A blade-deflection problem changes with cutting conditions. It may appear only in thick lumber, long rip cuts, wet or resinous wood, dense sheet goods, or when you feed the saw too quickly. The cut may begin straight and gradually curve as the blade heats, flexes, or is pushed sideways.
A saw alignment problem is more consistent. With a sharp, appropriate blade and a stable guide, the tool repeatedly leaves the line in the same direction, including on easy cuts in flat material. The saw may also cut differently depending on whether you follow the blade-side edge or the motor-side edge of the shoe.
Do not try to steer the saw back onto the line while the blade is buried in the cut. Twisting a circular saw makes the rear of the blade rub in the kerf and can cause binding or kickback. Dull blades, a closing kerf, and twisting the saw in the cut are recognized binding hazards. HSEBlog circular saw safety guidance and BIYOTI’s kickback overview both identify blade pinch and misalignment as common triggers.
Make the Saw Safe Before Inspecting It
Disconnect a corded saw from power. Remove the battery from a cordless saw. Wait for the blade to stop completely before setting the tool down, and never inspect, clean, or change a blade with the saw able to start.
Check that the lower guard moves freely and returns fully to its closed position. Do not prop the guard open or defeat it to finish a difficult cut. If the guard drags, sticks, or does not return reliably, take the saw out of service until it is corrected according to the current manufacturer instructions.
Also verify the blade diameter, arbor size, mounting direction, and maximum blade speed in the saw and blade documentation. Do not assume that a blade fits safely because it can be mounted. The blade’s marked speed rating must be suitable for the saw, and the saw manufacturer’s manual is the controlling source for compatible accessories and service procedures.
Step 1: Check the Workpiece and Support Setup
A closing kerf can push the blade sideways or trap it. This is especially common when cutting a board supported at both ends with the cut located in the middle: as the board sags, the two sides of the kerf can squeeze together.
Set up the cut so the work remains stable and the offcut can drop or move away without closing the kerf. Support large panels broadly, not just at a few high points. Keep supports away from the blade path. For long solid-wood boards, watch for internal stress that makes the kerf close, open, or shift as the cut advances.
For crosscuts, arrange support so the waste can fall away after the cut. For rip cuts, do not assume a board will remain straight after it is divided; grain stress can move either half. If the kerf visibly closes behind the blade, stop the saw, keep both hands on the tool until the blade stops, and reset the support arrangement. Do not hold the kerf open with a hand.
Set blade depth only slightly deeper than the stock. Fine Homebuilding recommends approximately 1/4 inch of blade projection below the material for smoother, safer cutting. Too much exposed blade can increase the chance of binding. Fine Homebuilding’s circular saw setup guidance explains the relationship between depth setting, blade exposure, and kickback risk.
Step 2: Rule Out Feed Pressure and Saw Handling
Let the blade cut at its own rate. If you have to lean hard on the saw to keep it moving, something is wrong: the blade may be dull, the material may be demanding more than the blade is designed to handle, or the kerf may be pinching.
Keep the shoe flat on the workpiece and apply forward pressure in line with the intended cut. A straightedge guide helps, but it cannot correct a saw being pushed sideways. If the guide is positioned incorrectly or shifts during the cut, it can force the shoe—and therefore the blade—off course.
Make a short test cut in clean, flat scrap. Use a steady, moderate feed rate and stop if the motor labors, the blade slows noticeably, smoke appears, or the saw begins to pull sideways. Those symptoms point first to cutting resistance rather than a simple line-marking error.
Step 3: Inspect the Blade Closely
A blade can look acceptable from a distance and still cut crooked. Remove it only after disconnecting power, then inspect both faces and the teeth.
Look for these problems:
Dull, damaged, or uneven teeth
A dull blade makes more heat and needs more feed force. That increases the chance that the blade will flex in a demanding cut. Missing carbide tips, chipped teeth, or teeth damaged on only one side can make the blade cut toward the side that is still doing more of the cutting.
Do not continue using a blade with missing teeth, cracked metal, loose carbide, or obvious damage. Replace it. A blade that was sharpened improperly or has uneven tooth geometry may also wander even though it appears sharp.
Pitch and resin buildup
Sticky residue on the blade increases friction. Friction creates heat, and heat can worsen blade instability during a long cut. Clean only as directed by the blade maker, using a blade-cleaning method that does not damage the teeth, printed safety markings, or protective coating. If the blade remains discolored, warped, or performs poorly after cleaning, replace it.
For routine care, see our related guide: circular saw blade maintenance.
A warped or overheated blade plate
Lay the blade on a known-flat surface and look for obvious rocking or visible distortion. A blade that has been pinched, overheated, dropped, or forced through a cut can be damaged even when the teeth are intact. Do not attempt to straighten a damaged circular saw blade yourself. Replace it or follow the blade manufacturer’s service guidance.
The wrong blade for the material or cut
Blade selection matters most when cutting thick, dense, wet, dirty, or abrasive stock. A light, thin-kerf blade may be more prone to deflection than a stiffer blade when the material and saw can accommodate a heavier-cutting blade. A blade intended for one material may also cut poorly in another.
Choose a blade specifically marked for the material and type of cut you are making, then confirm compatibility in the saw manual. Avoid using a wood-cutting blade on material it was not designed to cut. Hidden fasteners, grit, reclaimed lumber contamination, and hardened glue lines can damage teeth quickly and change how a blade tracks.
Step 4: Run a Controlled Reference-Blade Test
The fastest way to distinguish a bad blade from a bad saw is to install a new or known-straight reference blade that is correct for the saw and material.
Use clean, flat scrap that is easier to cut than the stock causing trouble. Support it so the kerf cannot close. Clamp a straight guide securely. Set the blade depth correctly, start the saw before entering the material, and feed without forcing the tool.
Interpret the result:
- The reference blade tracks straight: The original blade was likely dull, dirty, damaged, warped, or poorly suited to the cut.
- The saw tracks straight in scrap but wanders in the original stock: The original material, support arrangement, blade selection, or feed pressure is likely the cause.
- The saw repeatedly pulls to the same side with the reference blade: Check blade mounting and saw alignment.
- The blade binds or the kerf closes: Correct the support and material setup before doing more testing.
Step 5: Check Blade Mounting and Saw Condition
With power disconnected, remove the blade and inspect the arbor area. Clean away sawdust or debris trapped between the blade, inner flange, outer washer, and mounting surfaces. A chip caught behind the blade can prevent it from seating flat.
Reinstall the blade exactly as the manufacturer specifies. Confirm that the flange, washer, and retaining bolt are present and correctly oriented. Tighten the fastener using the manufacturer’s procedure; overtightening, missing parts, or improvised hardware can create a dangerous condition.
Then check for obvious mechanical problems:
- Excessive side-to-side movement at the arbor.
- A bent or damaged shoe.
- Loose shoe-adjustment hardware.
- A blade that visibly wobbles when turned by hand.
- A guard or housing that contacts the blade.
Do not run the saw to “see if it settles down” when you suspect blade wobble, arbor damage, or bearing play. Those faults require professional service or replacement parts specified by the saw manufacturer.
Step 6: Check Shoe-to-Blade Alignment
The shoe must guide the saw in the same direction the blade cuts. If the shoe edge, built-in notch, or guide system is not parallel to the blade, a straight guide can make the saw cut off the line.
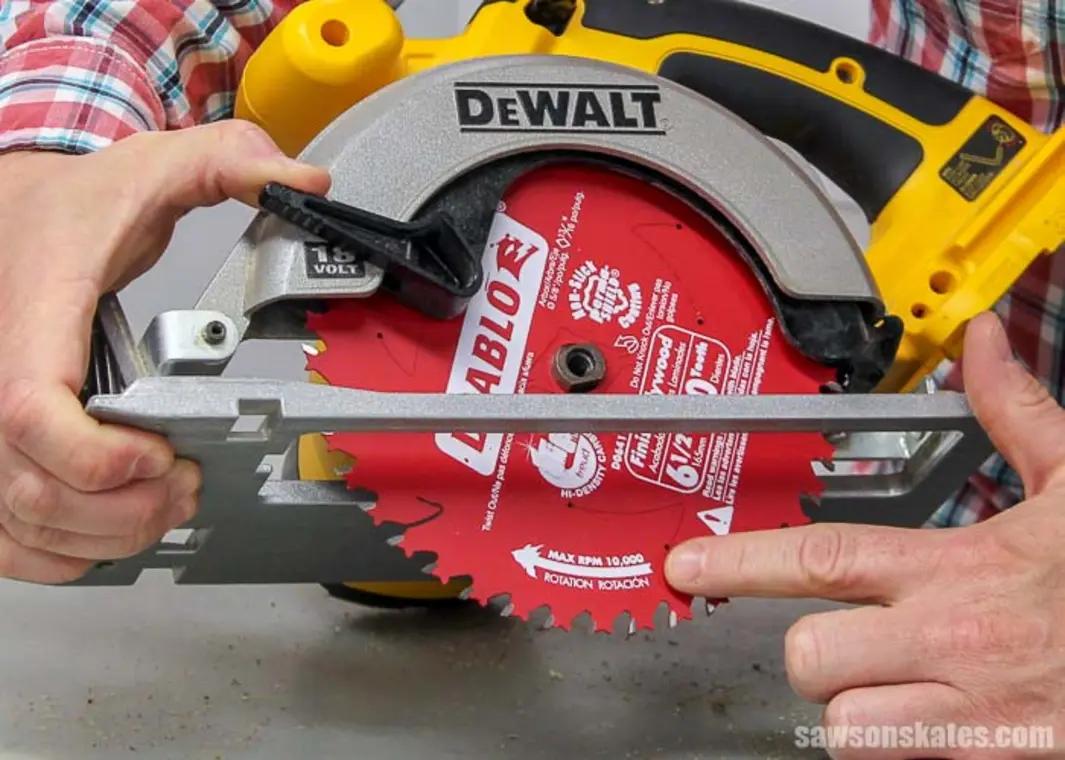
With the saw unplugged or battery removed, raise the guard only as needed to measure safely. Mark one tooth near the front of the blade. Measure from that same tooth to the chosen straight edge of the shoe. Rotate the blade by hand until the marked tooth is at the back, then measure again from the same tooth to the same shoe edge.
Using the same tooth matters because blades may have small variations from tooth to tooth. The two measurements should agree closely. If they do not, consult the current saw manual for the shoe-alignment procedure. Some saws provide an adjustment; others require service because the base, pivot, or mounting structure may be bent.
Do not bend the shoe by hand, enlarge adjustment holes, or modify guards and blade hardware. If the saw has been dropped or the base will not remain square after adjustment, replacement or professional repair is usually safer than continued troubleshooting.
When to Replace the Blade, Repair the Saw, or Change the Setup
Replace the blade when it is dull, damaged, contaminated beyond practical cleaning, visibly warped, missing carbide, or unsuitable for the material. A fresh, correct blade is also the most useful diagnostic baseline.
Change the cutting setup when the issue occurs only in certain stock or cut positions. Improve support, prevent kerf closure, use a stable guide, reduce feed pressure, and select a blade intended for the material. For sheet goods, a straight-cutting setup can also improve results; see how to cut plywood straight with a circular saw.
Repair or service the saw when a known-good blade still pulls consistently in controlled cuts, the shoe is out of parallel with the blade, the arbor has play, the blade wobbles, or the guard and mounting hardware do not operate correctly. Use the manufacturer’s current service information for replacement parts and adjustment limits.
A Short Troubleshooting Order to Remember
When a circular saw cuts crooked after starting correctly, work through the problem in this order:
- Stop if the blade binds, the kerf closes, or the saw kicks back.
- Improve work support and reset blade depth.
- Slow the feed and avoid steering the saw in the kerf.
- Inspect and clean the blade.
- Test with a correct, known-good blade.
- Check blade seating, flanges, and arbor condition.
- Measure shoe-to-blade alignment and follow the manual for adjustment or service.
This sequence prevents a common mistake: adjusting a saw to compensate for a blade or workpiece problem. A circular saw should cut straight with a sharp, properly mounted blade, an open kerf, stable support, and a guide that does not force the shoe sideways.
References
- What Happened? Circular saw blade deflecting, the guide …. (n.d.). https://www.reddit.com/r/woodworking/comments/6gdb1m/what_happened_circular_saw_blade_deflecting_the
- Why is my saw blade deflecting upward when cutting pine?. (n.d.). https://www.facebook.com/groups/1004601768015574/posts/1291308759344872
- Circular saw blade deflection - FineWoodworking. (n.d.). https://www.finewoodworking.com/forum/circular-saw-blade-deflection
- Blade deflection on Bandsaw - only some times. Why?. (n.d.). https://sawmillcreek.org/threads/blade-deflection-on-bandsaw-only-some-times-why.212981
- Circular Saw Safety: Guarding & Operating Procedures Guide. (n.d.). https://www.hseblog.com/circular-saw-safety
- Tablesaw Blade Deflection and Possible Solution. (n.d.). https://ncwoodworker.net/forums/index.php?threads%2Ftablesaw-blade-deflection-and-possible-solution.58795%2F=
- Choosing and Adjusting a Circular Saw - Fine Homebuilding. (n.d.). https://www.finehomebuilding.com/project-guides/framing/choosing-and-adjusting-a-circular-saw
- Circular Saw Safety: Prevent Kickback and Blade Binding - BIYOTI. (n.d.). https://biyoti.com/circular-saw-safety-prevent-kickback-and-blade-binding
- Troubleshooting Steel Cutting Circular Saw Blade Issues. (n.d.). https://coldsawshop.com/blogs/cold-saw-blog/troubleshooting-steel-cutting-circular-saw-blade-issues
- Misaligned circular saw blade. (n.d.). https://www.woodworkingtalk.com/threads/misaligned-circular-saw-blade.35379
 Why a Circular Saw Burns Wood: Causes, Checks, and Fixes
 Why Wood Binds During Saw Cuts and How to Prevent It
 Which Way Does a Circular Saw Blade Go? How to Check Installation Safely