A belt sander leaves stripes on a deck or porch when it removes more wood in one pass, lane, or edge of the belt than in the next. The usual causes are a loaded or worn belt, grit that is too coarse, skipped grit steps, sanding across the grain, pausing in one spot, uneven hand pressure, or a belt that is not tracking correctly.
Stop trying to erase the stripes with more random passes. First identify whether the marks are shallow scratch lines, color differences from remaining finish, or actual low spots you can feel with a straightedge. A belt sander can remove deck material quickly enough to turn a cosmetic problem into a permanently uneven board.
Identify the type of stripe
Fine, parallel scratch lines
These are usually sanding scratches left by an abrasive that is too coarse for the final surface, or by moving to a finer grit too quickly. Deep scratches from a coarse belt remain visible after stain because stain can darken their edges.
The fix is to sand consistently with the grain, then remove the previous scratch pattern with the next finer grit. Abrasive troubleshooting guidance identifies incorrect belt selection and skipped grit progression as common causes of visible sanding marks. Read the supplied sanding-belt guidance.
Wide light and dark bands
These often mean old stain, paint, weathering, or gray wood remains in low areas while the high areas have been sanded clean. They can also appear when one side of the belt cuts harder than the other.
Do not keep sanding the entire deck until every board is the same color. Check one affected board at a time. If the remaining dark areas are only in the grain or are shallow finish residue, a less aggressive finishing step may be enough. If they are in depressions, aggressive sanding can make the board thinner and more uneven without fully removing the discoloration.
Grooves, dips, or ridges you can feel
These are low spots, not merely sanding marks. They commonly result from stopping with the belt on the wood, pressing down at the front or rear of the tool, tipping the sander at a board edge, or repeatedly working a stubborn patch.
A handheld belt sander is poorly suited to leveling widespread low spots across a deck. Replace badly cupped, checked, split, or deeply eroded boards rather than trying to machine every defect away.
Check the belt before changing your technique
A fresh, properly installed belt should cut evenly. Inspect the belt whenever stripes begin suddenly or one edge of every pass looks deeper.
Replace a loaded or worn belt
Old exterior coatings, resin, dirt, and sanding dust can clog abrasive grains. A loaded belt rubs and cuts unevenly, so the operator often presses harder and makes the striping worse. Replace a belt that looks glazed, has packed debris, has a torn seam, or no longer cuts evenly.
Use a belt intended for wood and the material being removed. Follow the belt sander manufacturer’s manual for the correct belt size, installation method, and approved accessories. Manufacturer safety documentation also emphasizes using recommended accessories and keeping machinery in a dry operating environment. See the supplied manufacturer manual safety guidance.
Check belt tracking
A belt that runs toward one edge can cut a heavier line along that side, damage the belt, and make the tool hard to control. With the tool unplugged, inspect the belt for centered placement and damage. Then use the tracking adjustment only as described in your specific sander’s current manual.
Do not assume adjustments are the same across models. Verify the manufacturer’s instructions for tracking, belt changes, dust collection, switch operation, and inspection before use.
Inspect the platen and rollers
A damaged platen, worn roller, embedded debris, or loose mechanical part can transfer a repeating defect to the wood. If a line repeats at regular intervals or the tool vibrates unusually, stop sanding. Clean the tool as the manufacturer directs and have damaged parts serviced rather than trying to compensate by pushing harder.
Use a grit progression that removes scratches, not just finish
Start with the least aggressive grit that will remove the failing finish in a reasonable number of passes. On a test area, many deck jobs can begin with a medium-coarse belt; move coarser only if the coating is truly resisting removal. Then use progressively finer belts to erase the previous scratch pattern.
A practical sequence is often:
- Start with 60 grit on a small test patch for heavy weathering or stubborn stain.
- Drop to 40 grit only when necessary for thick, failing finish, and use it sparingly.
- Follow with 80 grit to remove the coarse scratches before applying a compatible exterior coating.
Do not jump from a very coarse belt directly to a fine belt. The finer belt may polish the high areas while leaving deep coarse scratches in the low areas. Also do not sand deck boards excessively smooth unless the finish manufacturer specifically calls for it; verify the coating’s current surface-preparation instructions.
Correct the sanding technique
Sand one board at a time
Run the belt sander lengthwise with the grain on a single board. Crossing from board to board makes it easier to create uneven lanes because adjacent boards may have different hardness, cupping, stain absorption, and wear.
Keep the base flat. Start the tool before it contacts the board if your manual directs that method, lower it gently, and keep it moving at a steady pace. At the end of a pass, avoid rocking the tool upward or stopping in place.
Use light, even pressure
The sander’s weight should do most of the work. Downward pressure makes the belt cut faster but also magnifies low spots, edge gouges, and stripes. Hold the handles steadily without forcing the front or back of the machine into the board.
Overlap adjacent passes slightly and use the same travel speed. If one pass looks cleaner than the next, change the belt or correct the underlying condition instead of dwelling on the darker lane.
Finish with a less aggressive sander when appropriate
A belt sander is best treated as a stock-removal tool, not a broad finishing tool for an entire porch. After repairing isolated heavy marks, use a less aggressive finishing method suitable for the board condition and the coating system. Hand sanding may be safer around edges, fasteners, rail posts, and transitions where a belt sander can dig in.
Check whether the wood, not the sander, is the problem
Heavily weathered decking often has raised grain, soft earlywood, hard latewood, cupping, checking, and localized rot. A belt sander cuts the softer areas faster, which can exaggerate the board’s natural texture and create a washboard appearance.
Use a straightedge across suspect boards. If the board is cupped, badly worn, soft, cracked, or decayed, replacement is usually a better repair than deep sanding. Sanding cannot restore sound wood where weathering has already removed material unevenly.
Moisture decision point
If boards feel damp, show recent rain or dew, or have been pressure-washed recently, postpone sanding. Wet or unevenly damp wood does not sand consistently, can clog belts quickly, and should not be coated until it meets the coating manufacturer’s moisture and preparation requirements.
Correct the water source before refinishing. Look for poor drainage, leaking planters, blocked gaps between boards, splashback, or areas that remain shaded and damp.
Paint decision point
Do not assume every opaque coating is stain. If the deck or porch has old paint, peeling unknown coating, or multiple layers, pause before dry sanding. Arrange appropriate coating identification, testing, containment, and disposal in accordance with current local official guidance, especially for older surfaces. A belt sander can create a large amount of fine contaminated dust very quickly.
A quick recovery plan for striped boards
- Stop sanding and vacuum or brush the board clean so you can see the actual defect.
- Check whether the stripe is a scratch, remaining finish, or a low spot.
- Replace a loaded, damaged, or worn belt.
- Confirm belt tracking according to your sander’s manual.
- Test the least aggressive effective grit on an inconspicuous section.
- Sand lengthwise on one board using light pressure and continuous movement.
- Step through finer grits until the earlier scratch pattern is gone.
- Stop and reassess if you begin creating dips, exposing fasteners, or thinning weathered boards.
When to stop using the belt sander
Put the belt sander aside when the work involves broad finish removal across many boards, paint of uncertain composition, wet wood, deeply cupped boards, protruding fasteners, rot, or a tool that will not track or run smoothly. Inspect the deck first, sink or remove protruding fasteners as appropriate, and verify all safety and operating steps in the current tool manual.
For more on keeping abrasives effective, see how to clean belt sander belts. A clean, correctly tracked belt and a controlled grit progression will solve most belt sander marks on deck boards before they become deep stripes.
References
- Belt Sander Troubleshooting. (n.d.). https://www.facebook.com/fb-answers/belt-sander-troubleshooting?locale=sr_RS
- 🚫 Belt sanders (and drum sanders) can “stripe” a floor in …. (n.d.). https://www.facebook.com/61575626237502/posts/-belt-sanders-and-drum-sanders-can-stripe-a-floor-in-seconds-heres-whyif-youve-e/122160401738854207
- Why Does My Belt Sander Leave Marks?. (n.d.). https://sandingbeltdepot.com/belt-sander-leave-marks
- Hand held belt sander for wood-do they leave marks like G …. (n.d.). https://www.mig-welding.co.uk/forum/threads/hand-held-belt-sander-for-wood-do-they-leave-marks-like-g-discs.7345
- Need help troubleshooting an old wide belt sander. (n.d.). https://www.woodworkingtalk.com/threads/need-help-troubleshooting-an-old-wide-belt-sander.227757
- Wide Belt Sander Problems: Tracking, Chatter, Burning. (n.d.). https://www.maverickabrasives.com/blogs/sandpaper-guides/common-wide-belt-sander-problems-and-how-to-fix-them
- Advice to Eliminate Sanding Lines From Your Big Machine. (n.d.). https://www.woodfloorbusiness.com/sanding/troubleshooting/article/15125533/streaky-sanding-advice-to-eliminate-sanding-lines-from-your-big-machine
- MODEL G0866 37" WIDE BELT SANDER w/ …. (n.d.). https://cdn0.grizzly.com/manuals/g0866_m.pdf
- Common Wide Belt Sander Issues & Solutions | Troubleshooting Guide. (n.d.). https://www.fintechabrasives.com/blog/fintech-blog-1/common-wide-belt-sander-issues-solutions-4
- Why Is Your Belt Sander Leaving Lines? 5 Causes and Fixes. (n.d.). https://ultimatefloorcare.co.uk/blogs/news/why-is-your-belt-sander-leaving-lines-5-causes-and-fixes
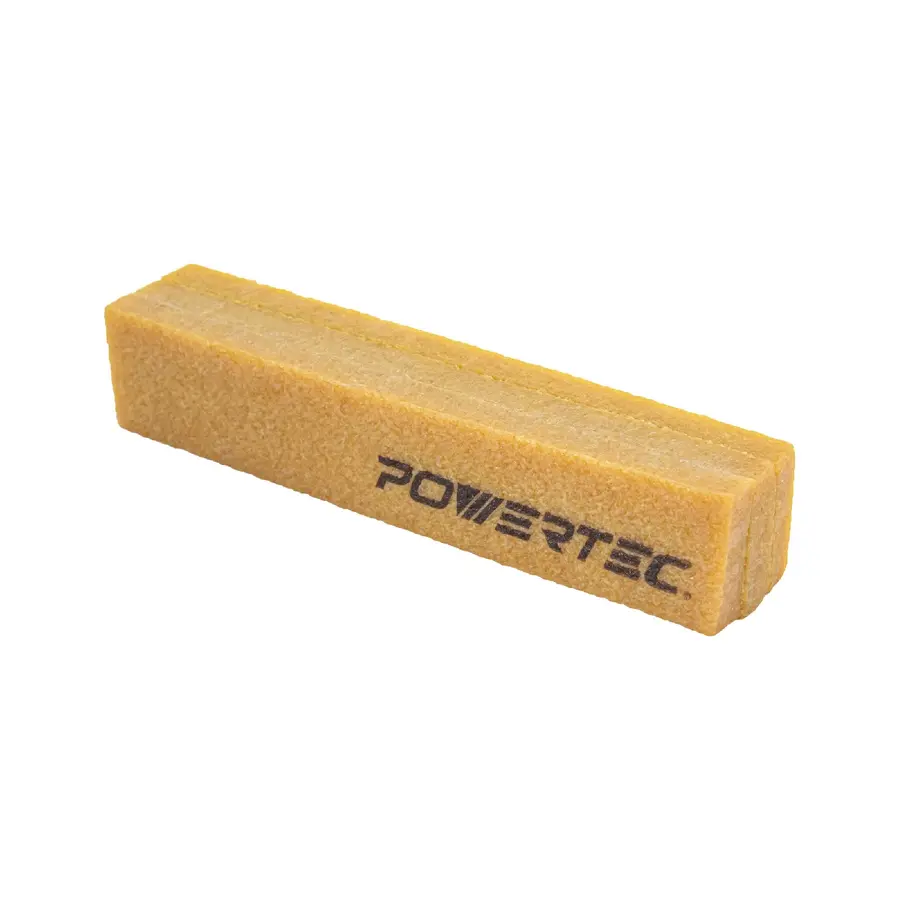 Can You Clean a Belt Sander Belt? When a Cleaning Stick Helps and When to Replace It
 How to Use an Angle Grinder With Less Kickback When Cutting Metal
 How to Manage Bench Grinder Dust in a Home Shop